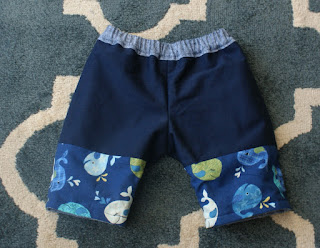
 |
| Little stars shirt and pants front view |
Although I bought the set last year, this is the fist time I've sewn these patterns. I picked Puperita's Little Stars Set as a gift for my nephew, because it has classic style and I know her patterns are well drafted and finished. I was not disappointed.
 |
| Little stars shirt and pants back view |
The patterns are sold separately as a shirt and pants, or you can save a bit if you buy them combined. They offer ten sizes ranging from newborn (22" or 56cm tall) to size 6 (45 3/4” or 116cm tall). Puperita provides a size chart that is based on your child's measurements (height, weight, waist, hip, arm length, and inside leg length) and recommends that you choose a size based on height. She also provides finished garment measurements (shirt back length and pants side length) and the amount of ease accounted for in the finished garment. The shirt has 4.7" of ease from the chest and the pants have 6.3" of ease in the hips. I love that she tells you how much ease is in the garment, because it allows you to know how she designed it to fit. Both of these are supposed to be very comfortable items.
The patterns have sizes split up into three groups. NB-3M-6M, 12M-18M-2YRS, and 3YRS-4YRS-5YRS-6Yrs. Each group has it's own cutting layout for both 44" and 60" fabric. She also provides a recommended fabrics list and a fabric requirement chart for both 44" and 60" fabrics.
The instructions feature clear pictures and illustrations where a picture may need a bit more explaining. She uses the same fabric throughout the tutorial (other designers are not so kind). You are reminded to press between sewing steps, when to trim seam allowances and clip corners, and finish seams that will be left exposed.
Now onto the actual patterns.
 |
| The little stars shirt front view |
 |
| Peter pan collar with bias trim |
 |
| Bias finish on the neckline and the facings on the interior. |
The shirt has a peter pan collar with instructions for adding bias between the layers that really steps up the quality of the garment. The collar is attached with bias tape, so there are no ugly seams on the neckline. The front shirt pieces have facings built into the pattern. I opted to interface the facing, since I was going to use snaps. I love how the facing is used to finish the collar and neckline, everything is so clean and contained. The last 1.5" of the sleeves are finished separately from the side seam, so that the snap cuff actually allows the bottom of the sleeve to open. It is a very cute touch that I didn't even notice on the pattern sales page. The sleeve pieces are symmetrical and set in flat, but honestly it's a loose fitting child's garment, so I don't see any problems with that. The pattern pieces contain helpful markings to matchup your collar with your neckline, sleeves with the shoulders, and buttonhole placement. She even provides instructions for how to install snaps on the shirt and what side to use for boys or girls. I used quilting cotton, premade wide bias tape, and snaps for the shirt pictured.
| Back view |
 |
| Little stars pants front view of pockets |
The pants are fully lined with no exposed seams. The feature a roll-up cuff and the sweetest pockets. There are eight pocket pieces to iron and topstitch, which is a lot of work, but they really make the pants.
 |
| Colorblocked interior and no exposed seams on the waistband. |
I didn't have enough fabric to make both the pants and the shirt, so I opted to color block the lining layer. It wasn't difficult, I just cut the pattern piece and added seam allowances, so I wouldn't change the pattern shape and height.
Aside from the pockets, the pants were a very easy sew. I chose a gorgeous blue fabric from my Aunt and paired it with the quilting cotton that I used for the top. The remainder of the interior is navy blue twill.
The pattern offers different pieces for the front and back. The back offers a higher rise, which is important for a good fit. The pieces include pocket placement guides, so you don't have to guess where they should go.
I'm really happy that I picked these patterns to sew my newborn nephew a special outfit. I will continue to trust Puperita's patterns when I need something new to sew. I can't wait to see it on him.

Super cute, and love the fabric choice. The outfit is going to look gorgeous!
ReplyDeleteGorgeous outfits!
ReplyDelete